Friday 30 October 2015

Guest Post: Jen's Top 5 Sources for Secondhand Fabric

(image source: Make Do and Mendable)

Hopefully you've already 'met' Jen from Make Do and Mend-able, who is preaching to the choir round these parts with her investigations into living ethically and sustainably with an emphasis on handmade. If you haven't then I thoroughly recommend you visit to her lovely blog, and whilst you're over there, check out her fabulous Ted X talk about the year she and her family pledged to buy nothing new. Everything she is doing is so positive and relevant, and her manifesto makes me want to scream 'YES TO ALL THIS!'. If Dolores wasn't in bed asleep right now, I'd probably scream it out loud for real. Anyways...

Jen posted her Top 5 Sources for Secondhand Fabric back in May, and it was so good to read. I'd been brewing a similar blog post for a while in response to the many questions that I've received in the topic both in blog comments and at the classes I teach, but had failed to get as far as clicking the 'publish' button to date. It's something that I think is incredibly important for limiting the impact of our hobby on the environment, and thankfully Jen has allowed me to repost her original post in the hope that it may inspire more sewers to get hunting.... Thanks Jen! 

Sewing your own might seem the 'greener' option, but fabric production is a pretty resource and labour intensive business. Growing cotton uses vast amounts of water and pesticides, and has a heavy environmental impact. An easy way to still sew your own, but lessen your 'sewing footprint' is to source your fabric secondhand. Here's my Top 5 places to find secondhand fabric:

(image source: The Guardian via this post)

1. Charity Shops 

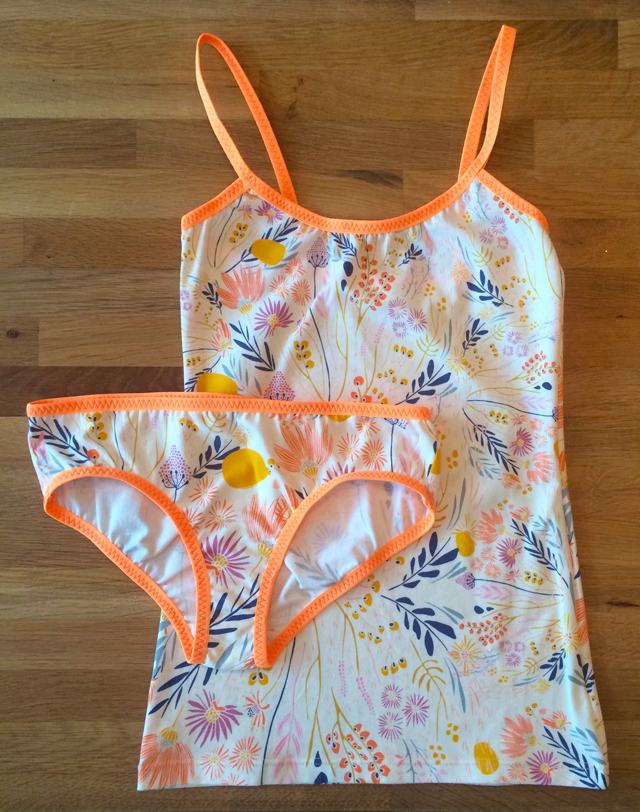
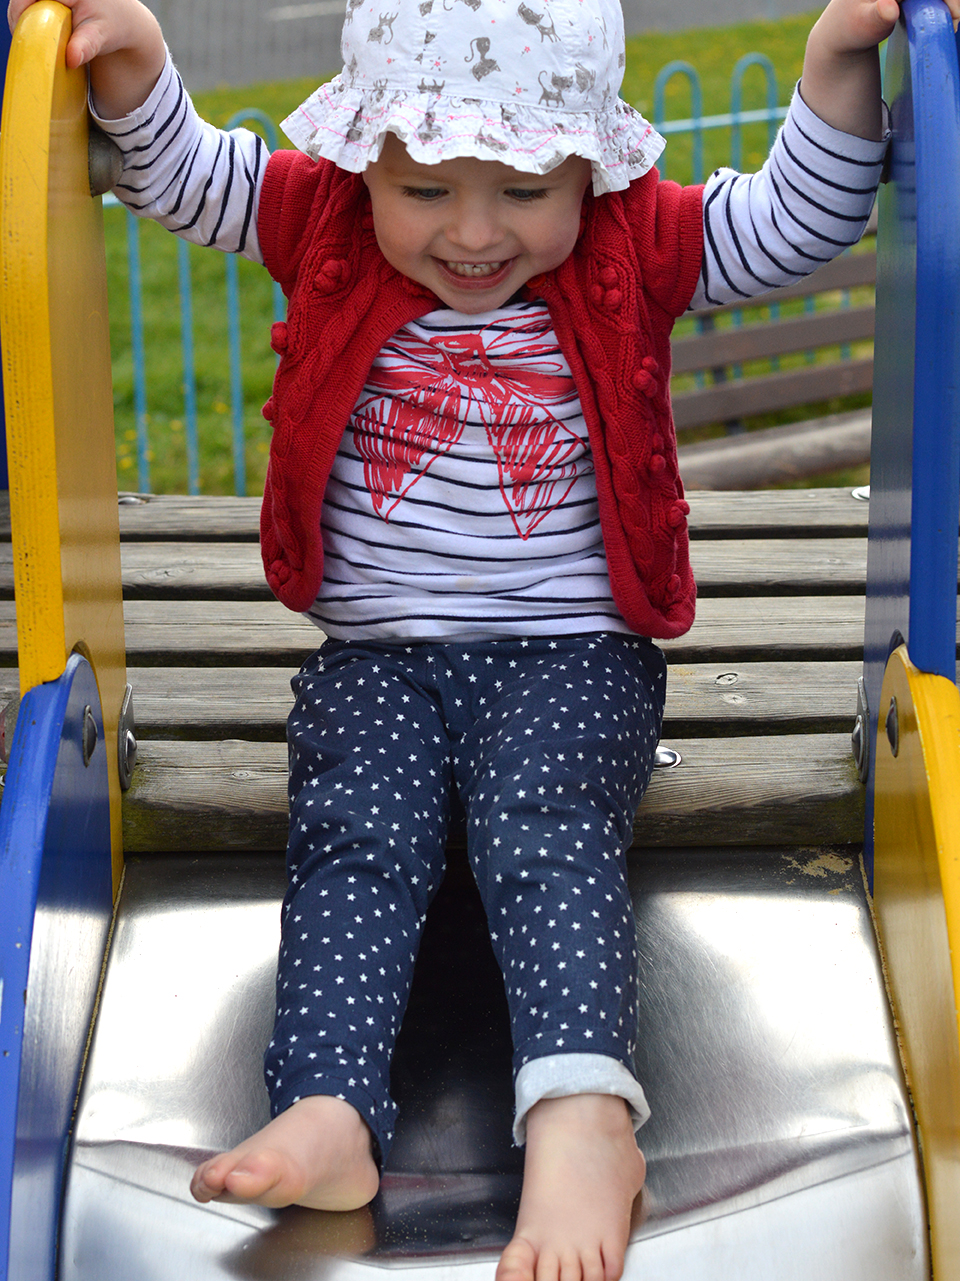
If you get lucky, charity shops will sometimes have donations of 'acutal' fabric from someone who is having a clear out. Failing that, keep your eyes peeled for old duvets and sheets-there are often fabulous retro prints, and you get TONS of fabric for your money. Also check out the clothes rails for skirts and shirts in larger sizes, as the fabric from these can be salvaged to be made into something else.


2. Vintage Shops and fairs 

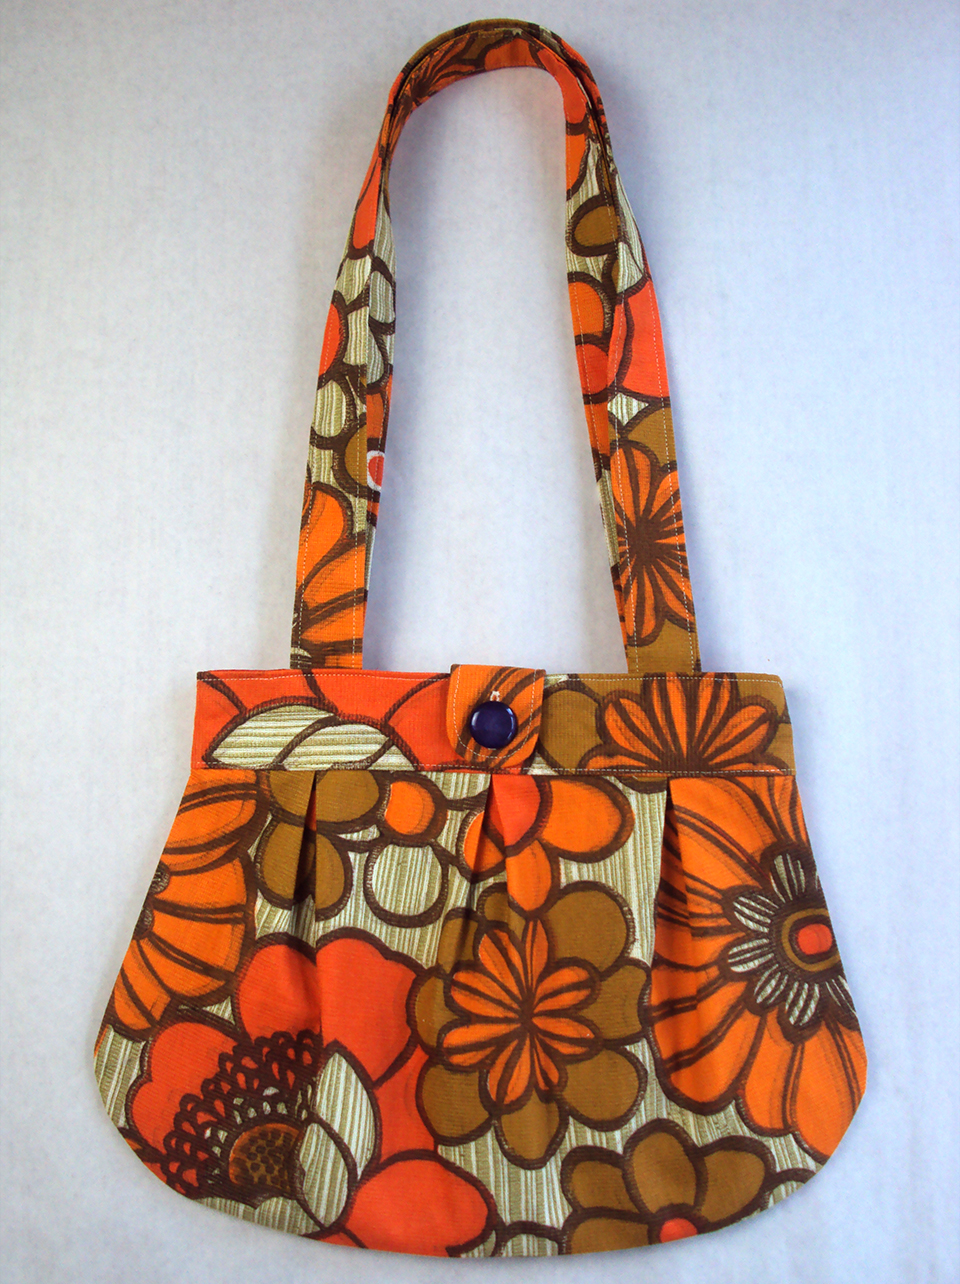
No excuses are needed for a rummage around a vintage shop, but while you are, be sure to keep a beady eye out for old curtains, and again, sheets and duvets, or even tablecloths. Sometimes there will be stashes of French linens, and tea towels, which are great for home furnishings.

3. Facebook 

Have a look on the Make Do and Mend-able Pre-loved Craft Stuff group. You can post a wanted if you are looking for something in particular eg. stretch fabric, or red cord etc. There are also lots of other groups like Fabric Addicts Destash and the Vintage Fabric Addict Support Group.


4. Instagram 

Some crafters will periodically have a 'de-stash' and list their unwanted fabric on Instagram. Search using #fabricdestash or #fabricforsale. It's a bit hit and miss, but you might unearth a gem! Also follow sewers whose blogs you admire, and you never know when they might choose to destash...!

(image source: Etsy)

5. E-bay, Pre-loved, Etsy 

These are all good places to find fabric, if you are prepared to do a bit of searching. Keep your search terms as specific as you can. If you just search "fabric" you will get thousands of suggestions! If you search for "red stretch knit fabric", or "yellow polka dot cotton" you are more likely to find what you are looking for more quickly.

One word of caution, there are lots of new fabrics for sale on E-bay now, and lots of people have set up E-bay shops to sell new fabric. If you just want to avoid the new fabrics coming up in your search, be sure to check the 'Used' box under Condition, in the search terms on the left hand side.

Thank you so much, Jen! That was great to read. I have a few more points to add on this topic, so I'll revisit it again soon. So, what about you? Is sewing with secondhand fabric something you think about? Have you scored any fab secondhand fabric recently? Do you have any tips on how/where to find it?

Thursday 22 October 2015

Fold Over Elastic: What The Hell is it, Exactly?

(image source: The Daily Stitch)

'What on earth is Fold Over Elastic then?'. This is a question that The Village Haberdashery were being frequently asked after they posted images of their awesome new range of FOE on social media recently. As a lover of the stuff, they turned to me to provide some explanation, which was originally posted here on the Daily Stitch blog last month. Here goes…

What is FOE?

Fold over elastic (as its mum would call it, FOE is its street name) is thin, flat elastic that has a line running along the centre of its length that makes it easy to fold in half. Sold by the metre, it can be bought in a variety of widths and textures, but commonly it is about 20mm when flat and has one matt and one shiny side. Its purpose is similar to bias binding in that it finishes raw edges, but has the added benefit of stretchiness and recovery.

(image source: The Village Haberdashery)

How does it work?

The FOE is positioned so the centre line is aligned with the raw edge of the fabric. The left hand side of the elastic width will be underneath the fabric at this point. The right hand side of the elastic width now gets folded over on top of the fabric, so that the raw edge is entirely enclosed between the two halves of elastic. You will then zigzag stitch through this three-layered sandwich to keep it all together.


What is it used for?

Most typically FOE is used for making undies, both in mass manufacture and in home sewing. The likelihood is that there’s some FOE present in your undies-drawer as we speak. If you’re interested in giving it a try, there are two PDF sewing patterns available for free download on my blog here. One is for making pants/undies/knickers and one is for making a vest/camisole/singlet, both are designed for knit fabric. 

You could try using FOE as an alternative for finishing necklines and/or cuffs on knit tops on both women’s wear and children’s wear. Little girl’s gathered skirts can be made super quickly with FOE with either knit or light-to-medium weight woven fabric. This is a great video on Youtube by Angry Chicken on how to do that. Nappy/diaper covers can be made with FOE, but usually a specific wide variety that has a fuzzy/terrycloth-type texture is used for this.


(image source: The Village Haberdashery)


Why should I use it?

There is a lot to love about FOE once you’ve got the hang of using it, but perhaps my favourite feature is that you apply the elastic whilst neatening a raw edge AT THE SAME TIME. A bit of fiddling and one row of stitching and both these tasks are complete, which makes for some speedy garment making. Available in a rainbow of colours and with two textures in each length (matt and shiny), there are so many possibilities for creating cool contrast finishes on suitable projects.


Any tips?

Through analyzing some shop-bought pants and a bit of experimentation, I figured out that a 3 step zigzag stitch works best when stitching through the sandwich of elastic and fabric. I like to use a stitch width of 5mm and stitch length of 1mm on my Janome sewing machine, but have a play about to see what you prefer.


Once you’ve mastered the basic ‘elastic/fabric sandwich and stitch’ application, you can amp things up by giving the elastic a slight tug as it passes through your machine. This creates a pleasing gathered effect. Experiment with tugging the elastic at various tensions to see how much or little gathering you are able to produce. A little gathering looks great on knickers, for example, and helps them to be snug when worn. A lot of gathering is great when creating gathered skirts or the cuffs for wide sleeves. See here (http://sozowhatdoyouknow.blogspot.co.uk/2010/08/how-to-construct-undies-with-serger-and.html) for my tips on using FOE to create pants/knickers/undies, and there are many more blog posts, tutorials and videos out there to help.

Monday 19 October 2015

New Sewing Pattern Sneaky Peek! Plus: A Call Out for Testers

**MY GOODNESS! I'VE HAD SO MANY RESPONSES TO THE CALL FOR TESTERS. THANK YOU ALL!!! I'M GOING TO CLOSE THE REQUEST FOR TESTERS NOW. THANKS AGAIN FOR YOUR SUPPORT**


Friends! I would like to introduce you to the next sewing pattern that I plan to release: the Anya shoulder bag pattern. I'd love to hear your initial thoughts, whatever they may be...

A brief explanation: the Anya bag is a deceptively voluminous, lined shoulder bag with an optional button tab closure. Like the Dolores batwing pattern, it will be available as a downloadable PDF file pattern. The pattern PDF will consist of just three pattern pieces: bag body, yoke and button tab. Dimensions will be given for the straps which are formed from a simple rectangle that can be drawn directly onto the fabric, rather than wasting your printer ink and paper by including it in the PDF. The bag should require only approx. 80cm of outer fabric, preferably a sturdy medium to thick woven fabric with no stretch content (I've found that curtaining and upholstery fabric work brilliantly, as do denim, twill and canvas) and 40cm of light to medium weight woven fabric for the lining. Fingers crossed, it'll be a suitable project for those fairly new to sewing and more experienced sewers alike. 

My hope is that this'll be the kind of pattern that you will want to make again and again, in many different fabrics, for yourself and possibly for your friends and family (I can't help but notice that there's a rather significant public holiday coming soon that traditionally involves gift-giving...). Over a number of years, I have made approx. ten squillion of these bags in various prints and solids, and the outcome each time always looks unique; the pattern seems to be a good canvas for many different types of fabric. 


A brief history: I drafted the first version of this pattern a number of years ago, and it has proved very popular over the last almost-decade. I used to make bags from this pattern, usually in vintage fabrics from 50s, 60s and 70s, and in African wax fabric, and sell them on various market stalls and at craft fairs. Unlike a lot of my other stock from that time, these bags always sold consistently well, and occasionally I got asked if I would share or sell the pattern. Well, it's finally time for me to do that!


So, the tester bit: I'm looking for about 6 or 7 testers with a variety of sewing-experience to try out the pattern and instructions and give me their honest feedback. If you think you might be interested in being a tester, please read on...


What will be required:
  • I will email you two PDF files, one with the pattern pieces that will need printing off, and the other with full instructions that will include large colour images that you may prefer to read on your computer screen to save on ink and paper. 
  • You will need to print off the pattern, make a bag as per the instructions, and email me your feedback ideally with a photo of your creation, all within two weeks. Normally, I'd suggest a longer time period, but I'm really hoping to release this pattern in November so people can use it for making Christmas presents.
  • I will email you some questions to respond to as part of your feedback, plus I'd love to hear your thoughts on any other aspect of the pattern/instructions that may not have been referred to in the questions
  • Unfortunately, I am not able to pay for your time nor supply you with fabric for the testing. I will, however, send you the finalised versions of both pattern and instructions once any corrections have been made. And you will have my undying gratitude, of course!

What will not be required:
  • You do not need to be a blogger or have any social media presence at all. I am not looking for reviews of the pattern until it is finalised, in fact please don't review this beta version of pattern and instruction, for obvious reasons! 

If you are willing and able to test this pattern, then please email me at sozoblog (at)  g mail dot com by the end of Sunday 25th October. Please write a sentence or two about your level of experience using sewing patterns, and of sewing generally. I'm only asking for this to make sure that I get testers with a range of experience levels. Many, many, many thanks in advance for anyone able to help me out with this. 

Thursday 15 October 2015

Twinkle Star Hosh Pants


As a person from the UK, I do NOT feel comfortable calling these pants as opposed to trousers. Yet that is what this sewing pattern is called, so I'm going to suck it up for the duration of this post. When I showed these to Dolores her response was, 'twinkle star trousers!' Except, she says trousers like 'trou-zeez'. 


Pattern:

The Hosh pants pattern by LouBee Clothing was part of the Perfect Pattern Parcel #2, which was on sale for a limited period at the beginning of last year. I was lucky enough to be invited to participate in the blog tour to promote said pattern parcel, so I scored those patterns for free. I like all but one of those patterns, so I intend to get round to using most of them at some point. 

There are a couple of things that appealed to me about the Hosh pants pattern. Firstly, the pattern is designed to be made in woven fabric that has a stretch content (elastane/lycra). I felt that was pretty cool because usually kid's trouser patterns are designed for non-stretch wovens or straight-up knit fabric. The Hosh pants pattern therefore comes with the potential to stash-bust small pieces of stretchy wovens and refashion/reuse unwanted garments made from that type of of fabric. Oh, the options...


Secondly, this pattern has an adjustable waist. Children's garments made from woven fabric (even a stretchy woven like this) are never going to have the same lifespan as a knit garment. Yet the additional feature of an adjustable waist, therefore, goes some way to making them longer lasting. Hurrah! 


The pattern is graded from 12months to 6 years. Dolores has just turned two, so I cut the size 2 with the size 3 length. I had heard on the grapevine that Hosh pants come up a little short, plus I'm looking for maximum usage for my efforts. She's currently rocking these with small turn-ups (or just one turn-up when her dad is dressing her, according to these pictures) so I think that going for the extra length was the right move. 

Making them was really enjoyable. The instructions were nice and clear, and the new-to-me adjustable waist feature gave me a little lesson. I'm not thrilled about how that part has turned out though; the inside of the waistband gets pulled a bit where the elastic creates tension on the buttons (which you can see a bit in the image below). That means that they don't sit very flat against her body at those points, but I'm not sure what you could do to prevent that. Perhaps Dolores should eat more cake?


I had one reservation in that the curve of the back rise of the pattern didn't look particularly curvy, my concern being that there wouldn't be enough room to accommodate a nappied botty. Those concerns seem to be unfounded though.  I'll be interested to see how they fit when she is no longer in nappies though. 


Fabric:

The twinkle-star™ fabric came from a bag of fabric pieces kindly given to me by Gill from Vintage Rockchick blog. We met up to visit the A-MAZING Alexander McQueen exhibition at the V&A in London earlier this year. Gill is a member of the V&A and offered to get me in for sweet FA. I hope that she'll be pleased that some of her lovely little stash has seen some use. 


The fabric itself is a stretch denim with a ditsy white star print that kind of looks like polka dots until you get up close. The reverse of the fabric is an off-white,which makes the turn-ups look like a cool feature, and not just a necessity for garment longevity! There was a sufficient quantity for cutting out these trousers, plus an additional waistband piece when one of them mysteriously went missing. Not really a mystery though, considering how messy and chockablock my sewing corner is. 


Thoughts:

Aside from the bulky side sections where the elastic pulls at the inside waistband, I believe this garment is a WIN overall. I'm excited to have a successful pattern that requires stretch woven fabric. I have a number of bits in the stash that may now see the Hosh treatment. 


Cost:

Pattern: £0 (but it can be purchased here for £6.43)
Fabric: £0
Buttons: £0 (stash)
Adjustable elastic: 30p
Total: 30p! Not bad. You can't even find anything in a charity shop for 30p these days. 

Monday 12 October 2015

How To Make Your Own Bias Binding


Do you follow the Village Haberdashery's blog 'The Daily Stitch'? If not, maybe you should, it's very pretty. They've recently released some super exciting plans over there about their new premises and how you can own a little piece of the business. Well, anyway, if you do already follow The Daily Stitch, you will probably have already seen this post that is to follow as I've been doing a spot of guest-blogging over there. However, Annie has be insanely generous and allowed me to re-post my guest posts on my own blog for those who may not have already seen it. 

This is a simple how-to/tutorial for making your own bias binding. It’s such a fun thing to do, and really helps give your sewing projects extra personality and swankiness! The variety of pre-made bias binding available is pretty limited, plus I find that the usual stuff can be pretty stiff, which is not great for garment sewing in particular. Whether you choose to make binding that perfectly coordinates with your project, or that creates a bold or pretty contrast, your garment making and quilting projects can be elevated to something even more unique!

What You Will Need:

Selecting Fabric:


First you’ll need to select your fabric. If you plan to make coordinating binding, then you will just need to harvest some scraps left over from your cutting out. If you intend to make coordinating binding, then light-to-medium weight cotton (like quilting cotton or shirting) is ideal. There are a couple of things to consider if selecting printed fabric. Keep in mind the scale of the print; it has to be a small design to show up well on a narrow strip of binding. Striped fabric can be fun when made into binding, but it can create an extra challenge if you attempt to make the joins unnoticeable.

In terms of quantity, we’ll be making the binding from diagonal strips of your fabric, so try to find some scraps that can be cut into decent length strips to save you from having to make lots of joins. If you are buying fabric specifically for making bias binding, a fat quarter should be ample.

How to Make Bias Binding:


Give your fabric a press and lay it flat. Position your set square, pattern master or ruler so one edge is at a 45 degree angle to the selvedge or your fabric (see picture above). Many set squares and pattern masters have a 45 degree angle line printed on them or are a triangle shape (like the one I’ve used here), so it is easy to find. However, if you do not have a set square or pattern master, no problem! Eye-balling a 45 degree angle will be fine, or if you prefer to be more accurate and still have the edge cut across the width of your fabric, bring the cut edge so that it lays on top of the selvedge, then press down on the fold you have made. When you open it out again a crease should have formed at the 45 degree angle required.

Use a marking tool to draw along the 45 degree line, then cut along it. If you have a rotary cutter and cutting mat then you can use these straight away and eliminate the need to draw a line on your fabric.


Time to decide how wide you want your finished bias binding to be. Think about what width you want the binding to be when it has been sewn round the edge or your project, then times that by four (X 4) to figure out how wide the bias strips will need to be cut. In the example photographed, I wanted the bias binding to be 1cm wide when sewn, so I made the bias strips 4cm wide.

Use a ruler and marking tool to draw another line that runs parallel to your bias cut edge, at the width that you just calculated. If you have a set square or pattern master that has lines printed along one edge, this can help you mark the correct strip width quickly. Cut with scissors or a rotary cutter.


Continue cutting strips until you feel you have more than enough to bind the edges of your sewing project. It may sound obvious, but it’s better to make too much bias binding than end up with not quite enough, so if you can, cut a couple of extra strips than you feel would be sufficient.


Now you need to join the strips to form one continuous length. Start by laying the ends of the strips on top of each other perpendicular with right sides together (see above).  The strips will be stitched together at a 45 degree angle (more 45 degree angles!) so pin the strips accordingly and mark the stitching line if you wish (see above). Stitch the joins.


All your strips should now be attached to each other with joins resembling the picture above.


Trim away the excess seam allowance at each join leaving about 1cm.


With your iron set at a temperature suitable for your fabric (test on a scrap first!), press the seam allowances open at each join. Trim away the little triangles of seam allowance that extend beyond the edges of your strip.  


Give each join another press from the right side to make the long strip extra flat.


Fold and press your strip in half lengthways. 


Open the strip again so you can see the crease that has been formed along the centre. Bring the top edge to meet the centre crease and press.


Bring the bottom edge to meet the centre crease and press.


Give your bias strip one more press from the right side and you’re done. TA DA! You have made your own beautiful bias binding!!!!!

Wednesday 7 October 2015

Double Denim & a Tova Top


Don't let the shades fool you, it's getting nippier round these parts. What you can't tell from these pics is that I'm wearing a vest underneath, so my nippy weather sewing has commenced. 

Pattern:

I really do love the Wiksten Tova pattern. Its details and proportions are really perfect and understated. Jenny Gordy could have made the gathering bolder, the sleeves more voluminous and so on, but I feel she totally nailed it and produced a really classy pattern that produces really wearable garments. I really enjoy wearing my grey tunic dress version, so I was excited to have another go to make a super casual Tova in this soft, light-weight denim. 


As with the previous version (technically versions, as I tried the pattern again in Ikat which I don't think worked very well and never got worn), I used the size M, grading out to a size L at the hips. When it came to construction, it was really fun trying to get the neatest finish I could managed. There's a fair bit of topstitching on this garment, so it requires a bit of time. One of the corners where one of the front inset panels attaches to the main front piece didn't go as well as I would have liked, but you'd never notice unless I forced you to stare at it with a magnifying glass. Not going to happen.  

This time round, I've left the open neckline free to flap as the pattern intends. On my grey version, I stitched a tiny invisible popper to protect my dignity and stop it from gaping quite so much, but with this one, I'm enjoying the freer vibe. However, when the weather warms up again next year and I no longer want to wear a vest underneath, I may well apply the popper trick to this one too. 


Fabric:

I may love this fabric even more than I love the Tova pattern! As you may know, I very rarely buy new fabric to sew with. However, as you also may know, I rarely say no to free stuff when it's offered to me. Which is how I occasionally get to try some out sewing with different bits of fabric that I didn't find in my stash or through second-hand sources. I chose this stuff when I was offered 2m of anything from  my blog sponsor the Fabric Godmother's stock in return for helping out at their open day back in August. Apparently it's '4oz washed denim', and it is soooooper soft and it was dreamy to sew with. It's kind of like chambray, buy way nicer, IMO. The Fabric Godmother also has it available in indigo and light blue, but I think the mid-blue is the perfect '70s tone. As you can see from these pics, it creases a bit. But it was so nice to sew with and feels great to wear, that I couldn't give a toss about that. 


Thoughts:

One thing that seems to be happening with this version that I hadn't noticed with my grey one, is there's a bit of tightness around my bicep area when I raise my arms up. You can see in the photo above how some creases have formed due to this occurrence. Hmm... It doesn't bother me particularly but I'm annoyed because I'm not sure what I would do about it, if I were to make this top again. I think making a straight-up size L would be too big around the shoulders, and I don't really feel that the sleeves are too narrow as there's more than enough room in there when my arms are by my sides. Any ideas?

Aside from that minor issue, I LOVE this top! I admit that I was a little worried about attempting to double denim, but I'm all about this '70s look. I'm excited to see what happens to this top after several rounds of wear and washing. I'm hoping that it it'll look and feel increasingly like something my mum kept hold of from back in the day!    

Cost:

This is a new category that I've decide to include when I review a new make. I love to see it on other people's blogs so I'm shamelessly copying.  

Pattern: £0 (BTW, if I have already used a sewing pattern, even if I paid for it previously, I'm going to class the cost as £0.)
Fabric: £0
Thread and notions: stash
Total = £0! Hurrah!!!!!

Saturday 3 October 2015

Happy Birthday to the Dolores Batwing Pattern: Stripes!

The Dolores batwing pattern was released the day after human-form Dolores turned one year old. Now the pattern-form Dolores is turning one! I've previously shared some awesome versions of the pattern made by other people in solids and prints. To celebrate its birthday today, I want to show you some examples from my favourite interpretation of the pattern: stripes!


(image source: Marilla Walker)

Ahh! This long-sleeved stripy Dolores top is the stuff (my) dreams are made of. This outfit of Marilla's is monochrome perfection, don't you think? 


This is Juliette's third version of the Dolores batwing pattern, and in her own words it 'feels like wearing pajamas, but way more classy'! With that pixie cut and awesome glasses, I imagine Juliette looks classy in her actual pajamas as well. 


(image source: Vondalin123 via Flickr)

More monochrome amazingness. Vondalin123 has created a more casual vibe with her short-sleeved Dolores top by omitting the cuff bands. I salute her (and will probably copy her too at some point!). 


(image source: Fabric Tragic)

Well look at this super cute little 'Where's Wally/Waldo?' number! Giveaway winner Sarah from Fabric Tragic lowered the front neckline slightly for this short-sleeved beauty, and then proceeded to pair it a dark grey Simplicity 2451 skirt (my second favourite skirt pattern of all time, BTW) and some of the nicest shoes I have ever seen. 


Related Posts Plugin for WordPress, Blogger...